|
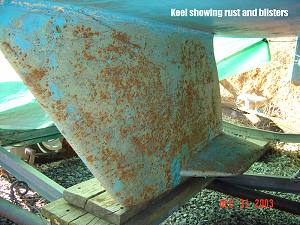
KEEL Solution
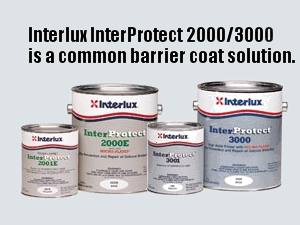
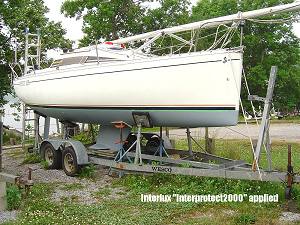
I followed the manufacturer's directions regarding the amount of product needed to give the proper barrier thickness. If small hull blisters or keel rust bubbles arise in the future, it'll be a simple matter to sand a very small area back to the base material, fair if necessary, and recover the repair with a few coats of IP2000, and some antifouling. InterProtect 2000 tips (ii) It might be tempting to buy the much more economical one-gallon IP2000 'kit'. However, even if coating the entire underwater part of a 24-footer, it provides at least three heavy coats of coverage, which cannot always be applied in one day. If left overnight after combining the two parts, IP2000 thickens significantly, and will be hard to apply evenly the next day. (iii) If applied carefully using a roller, IP2000 doesn't run, bit if it's applied too heavily (perhaps to reduce the number of separate coats), runs can form, which will be hard to sand out later. HULL
Hull Blisters: David Pascoe - Marine
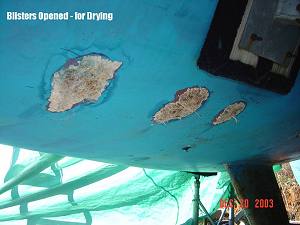
Surveyor I used a hand drill to puncture the center of each blister, being careful to avoid the spurt of nasty pale brown acidic fluid that spurted out. The drill bit only needs to penetrate the gel coat (~1/8" thick) to release the fluid. Wear eye protection and waterproof gloves, and wash off any of the liquid that gets on skin. An electric drill presents an electrocution risk when the fluid spurts out, and a hammer and screw driver or chisel could spatter the fluid. I added a few extra holes to each blister, especially at the lowest point on each, and let them drain overnight (for my convenience mainly). I used and electric drill fitted with 4-5" sandpaper disks (36-grit) on a rubber support to carefully grind out the gel coat and underlying wet fiberglass mat from each blister, being sure to extend a little into the surrounding and underlying good material, but not to grind too deeply in any one spot. I started with a battery-powered drill, but it didn't have enough power or battery life for the job. Finer sandpaper clogs and wears out too fast, and coarser paper is hard to control and risks deep gouges. I created a smooth transition from the surrounding good gel coat down into the repair so I could see easily when all the wet material was gone. It was not necessary to go deeper than about 1/4-1/3" into the hull to get all the wet glass out, but I had to go at least 1" outwards in all directions from the initial blister boundary to get all of the surrounding wet glass out. Under some blisters I could see obvious voids in the lay-up, which probably promoted blister formation. Some voids were rather deep so I just cleaned and dried them thoroughly instead of grinding too deeply into the hull to remove them.
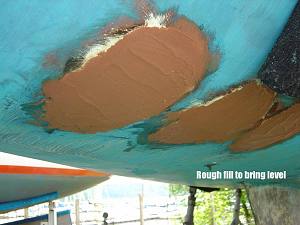
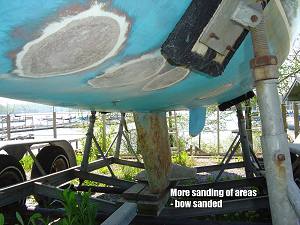
Cut pieces of woven mat (not chopped-strand mat) to fit the inner 3/4 of each area: number the areas and corresponding mat pieces if doing more than one blister. Prepare about 3/4 of a cup of West System epoxy (no fillers) for each 6-8" repair area, and use a cheap brush to paint it over all of each repair area. Submerge the piece of glass cloth into the remaining epoxy until it's fully saturated (almost transparent), then lay it into the repair area. Note: if you use too much epoxy to pre-wet the area or the cloth, the cloth might slide down the hull (on more vertical areas) or the epoxy will run down onto the surrounding good gel coat, which will be really hard to sand off later. Use acetone on a paper towel to wipe excess epoxy from around the repair, but not in the repair area, and to reposition the mat before it sets so it doesn't stand proud of the repair. As soon as the epoxy is no longer tacky, another layer of fresh epoxy can be brushed in, and overlayed with more cloth. Again, make sure all of the glass cloth lies below the level of the surrounding gel coat, and that the cloth is completely impregnated with epoxy. Several fairing materials can be used (InterLux sells a product for exactly this application). I faired with two applications of West epoxy mixed with filler. The first layer had a hard filler in it, and I made sure it didn't stand proud of the hull when set to avoid having to sand it. The second/final fairing used the 'softest' West filler, which I allowed to set slightly proud of the surrounding hull - I was very careful not to leave and grooves, and as few high ridges as possible, as this stuff is still pretty hard to sand. I faired each slight 'bump' by hand-sanding with a long (~8") sanding block and 80-grit paper. For a perfect finish, one could leave
the repair areas rough and below flush with the hull, then cover
with a nice layer of new gel coat, but this is not necessary if
a good barrier coat will be added. |

